标签:Feign OpenFeign Spring dept cloud 注解 Cloud

Netflix Feign 是 Netflix 公司发布的一种实现负载均衡和服务调用的开源组件。Spring Cloud 将其与 Netflix 中的其他开源服务组件(例如 Eureka、Ribbon 以及 Hystrix 等)一起整合进 Spring Cloud Netflix 模块中,整合后全称为 Spring Cloud Netflix Feign。
Feign 对 Ribbon 进行了集成,利用 Ribbon 维护了一份可用服务清单,并通过 Ribbon 实现了客户端的负载均衡。
Feign 是一种声明式服务调用组件,它在 RestTemplate 的基础上做了进一步的封装。通过 Feign,我们只需要声明一个接口并通过注解进行简单的配置(类似于 Dao 接口上面的 Mapper 注解一样)即可实现对 HTTP 接口的绑定。
通过 Feign,我们可以像调用本地方法一样来调用远程服务,而完全感觉不到这是在进行远程调用。
Feign 支持多种注解,例如 Feign 自带的注解以及 JAX-RS 注解等,但遗憾的是 Feign 本身并不支持 Spring MVC 注解,这无疑会给广大 Spring 用户带来不便。
2019 年 Netflix 公司宣布 Feign 组件正式进入停更维护状态,于是 Spring 官方便推出了一个名为 OpenFeign 的组件作为 Feign 的替代方案。
OpenFeign
OpenFeign 全称 Spring Cloud OpenFeign,它是 Spring 官方推出的一种声明式服务调用与负载均衡组件,它的出现就是为了替代进入停更维护状态的 Feign。
OpenFeign 是 Spring Cloud 对 Feign 的二次封装,它具有 Feign 的所有功能,并在 Feign 的基础上增加了对 Spring MVC 注解的支持,例如 @RequestMapping、@GetMapping 和 @PostMapping 等。
OpenFeign 常用注解
使用 OpenFegin 进行远程服务调用时,常用注解如下表。
| 注解 | 说明 |
|---|---|
| @FeignClient | 该注解用于通知 OpenFeign 组件对 @RequestMapping 注解下的接口进行解析,并通过动态代理的方式产生实现类,实现负载均衡和服务调用。 |
| @EnableFeignClients | 该注解用于开启 OpenFeign 功能,当 Spring Cloud 应用启动时,OpenFeign 会扫描标有 @FeignClient 注解的接口,生成代理并注册到 Spring 容器中。 |
| @RequestMapping | Spring MVC 注解,在 Spring MVC 中使用该注解映射请求,通过它来指定控制器(Controller)可以处理哪些 URL 请求,相当于 Servlet 中 web.xml 的配置。 |
| @GetMapping | Spring MVC 注解,用来映射 GET 请求,它是一个组合注解,相当于 @RequestMapping(method = RequestMethod.GET) 。 |
| @PostMapping | Spring MVC 注解,用来映射 POST 请求,它是一个组合注解,相当于 @RequestMapping(method = RequestMethod.POST) 。 |
Spring Cloud Finchley 及以上版本一般使用 OpenFeign 作为其服务调用组件。由于 OpenFeign 是在 2019 年 Feign 停更进入维护后推出的,因此大多数 2019 年及以后的新项目使用的都是 OpenFeign,而 2018 年以前的项目一般使用 Feign。
Feign VS OpenFeign
下面我们就来对比下 Feign 和 OpenFeign 的异同。
相同点
Feign 和 OpenFegin 具有以下相同点:
- Feign 和 OpenFeign 都是 Spring Cloud 下的远程调用和负载均衡组件。
- Feign 和 OpenFeign 作用一样,都可以实现服务的远程调用和负载均衡。
- Feign 和 OpenFeign 都对 Ribbon 进行了集成,都利用 Ribbon 维护了可用服务清单,并通过 Ribbon 实现了客户端的负载均衡。
- Feign 和 OpenFeign 都是在服务消费者(客户端)定义服务绑定接口并通过注解的方式进行配置,以实现远程服务的调用。
不同点
Feign 和 OpenFeign 具有以下不同:
- Feign 和 OpenFeign 的依赖项不同,Feign 的依赖为 spring-cloud-starter-feign,而 OpenFeign 的依赖为 spring-cloud-starter-openfeign。
- Feign 和 OpenFeign 支持的注解不同,Feign 支持 Feign 注解和 JAX-RS 注解,但不支持 Spring MVC 注解;OpenFeign 除了支持 Feign 注解和 JAX-RS 注解外,还支持 Spring MVC 注解。
OpenFeign 实现远程服务调用
下面我们就通过一个实例,来演示下通过 OpenFeign 是如何实现远程服务调用的。
1. 在 spring-cloud-demo2 下创建一个名为 micro-service-cloud-consumer-dept-feign 的 Spring Boot 模块,并在 pom.xml 中添加以下依赖。
- <?xml version="1.0" encoding="UTF-8"?>
- <project xmlns="http://maven.apache.org/POM/4.0.0" xmlns:xsi="http://www.w3.org/2001/XMLSchema-instance"
- xsi:schemaLocation="http://maven.apache.org/POM/4.0.0 https://maven.apache.org/xsd/maven-4.0.0.xsd">
- <modelVersion>4.0.0</modelVersion>
- <parent>
- <artifactId>spring-cloud-demo2</artifactId>
- <groupId>net.biancheng.c</groupId>
- <version>0.0.1-SNAPSHOT</version>
- </parent>
- <groupId>net.biancheng.c</groupId>
- <artifactId>micro-service-cloud-consumer-dept-feign</artifactId>
- <version>0.0.1-SNAPSHOT</version>
- <name>micro-service-cloud-consumer-dept-feign</name>
- <description>Demo project for Spring Boot</description>
- <properties>
- <java.version>1.8</java.version>
- </properties>
- <dependencies>
- <dependency>
- <groupId>net.biancheng.c</groupId>
- <artifactId>micro-service-cloud-api</artifactId>
- <version>${project.version}</version>
- </dependency>
- <dependency>
- <groupId>org.springframework.boot</groupId>
- <artifactId>spring-boot-starter-web</artifactId>
- </dependency>
- <dependency>
- <groupId>org.projectlombok</groupId>
- <artifactId>lombok</artifactId>
- <optional>true</optional>
- </dependency>
- <dependency>
- <groupId>org.springframework.boot</groupId>
- <artifactId>spring-boot-starter-test</artifactId>
- <scope>test</scope>
- </dependency>
- <!--Eureka Client 依赖-->
- <dependency>
- <groupId>org.springframework.cloud</groupId>
- <artifactId>spring-cloud-starter-netflix-eureka-client</artifactId>
- </dependency>
- <!-- Ribbon 依赖-->
- <dependency>
- <groupId>org.springframework.cloud</groupId>
- <artifactId>spring-cloud-starter-netflix-ribbon</artifactId>
- </dependency>
- <!--添加 OpenFeign 依赖-->
- <dependency>
- <groupId>org.springframework.cloud</groupId>
- <artifactId>spring-cloud-starter-openfeign</artifactId>
- </dependency>
- </dependencies>
- <build>
- <plugins>
- <plugin>
- <groupId>org.springframework.boot</groupId>
- <artifactId>spring-boot-maven-plugin</artifactId>
- <configuration>
- <excludes>
- <exclude>
- <groupId>org.projectlombok</groupId>
- <artifactId>lombok</artifactId>
- </exclude>
- </excludes>
- </configuration>
- </plugin>
- </plugins>
- </build>
- </project>
2. 在 micro-service-cloud-consumer-dept-feign 下的类路径(即 /resources 目录)下,添加一个 application.yml,配置内容如下。
- server:
- port: 80
- eureka:
- client:
- register-with-eureka: false #服务消费者可以不向服务注册中心注册服务
- service-url:
- defaultZone: http://eureka7001.com:7001/eureka/,http://eureka7002.com:7002/eureka/,http://eureka7003.com:7003/eureka/
- fetch-registry: true #服务消费者客户端需要去检索服务
3. 在 net.biancheng.c.service 包下创建一个名为 DeptFeignService 的接口,并在该接口上使用 @FeignClient 注解实现对服务接口的绑定,代码如下。
- package net.biancheng.c.service;
- import net.biancheng.c.entity.Dept;
- import org.springframework.cloud.openfeign.FeignClient;
- import org.springframework.stereotype.Component;
- import org.springframework.web.bind.annotation.PathVariable;
- import org.springframework.web.bind.annotation.RequestMapping;
- import org.springframework.web.bind.annotation.RequestMethod;
- import java.util.List;
- //添加为容器内的一个组件
- @Component
- // 服务提供者提供的服务名称,即 application.name
- @FeignClient(value = "MICROSERVICECLOUDPROVIDERDEPT")
- public interface DeptFeignService {
- //对应服务提供者(8001、8002、8003)Controller 中定义的方法
- @RequestMapping(value = "/dept/get/{id}", method = RequestMethod.GET)
- public Dept get(@PathVariable("id") int id);
- @RequestMapping(value = "/dept/list", method = RequestMethod.GET)
- public List<Dept> list();
- }
在编写服务绑定接口时,需要注意以下 2 点:
- 在 @FeignClient 注解中,value 属性的取值为:服务提供者的服务名,即服务提供者配置文件(application.yml)中 spring.application.name 的取值。
- 接口中定义的每个方法都与服务提供者(即 micro-service-cloud-provider-dept-8001 等)中 Controller 定义的服务方法对应。
4. 在 net.biancheng.c.controller 包下,创建一个名为 DeptController_Consumer 的 Controller 类,代码如下。
- package net.biancheng.c.controller;
- import net.biancheng.c.entity.Dept;
- import net.biancheng.c.service.DeptFeignService;
- import org.springframework.web.bind.annotation.PathVariable;
- import org.springframework.web.bind.annotation.RequestMapping;
- import org.springframework.web.bind.annotation.RestController;
- import javax.annotation.Resource;
- import java.util.List;
- @RestController
- public class DeptController_Consumer {
- @Resource
- private DeptFeignService deptFeignService;
- @RequestMapping(value = "/consumer/dept/get/{id}")
- public Dept get(@PathVariable("id") Integer id) {
- return deptFeignService.get(id);
- }
- @RequestMapping(value = "/consumer/dept/list")
- public List<Dept> list() {
- return deptFeignService.list();
- }
- }
5. 在主启动类上添加 @EnableFeignClients 注解开启 OpenFeign 功能,代码如下。
- package net.biancheng.c;
- import org.springframework.boot.SpringApplication;
- import org.springframework.boot.autoconfigure.SpringBootApplication;
- import org.springframework.cloud.openfeign.EnableFeignClients;
- @SpringBootApplication
- @EnableFeignClients //开启 OpenFeign 功能
- public class MicroServiceCloudConsumerDeptFeignApplication {
- public static void main(String[] args) {
- SpringApplication.run(MicroServiceCloudConsumerDeptFeignApplication.class, args);
- }
- }
Spring Cloud 应用在启动时,OpenFeign 会扫描标有 @FeignClient 注解的接口生成代理,并注人到 Spring 容器中。
6. 依次启动服务注册中心集群、服务提供者以及 micro-service-cloud-consumer-dept-feign,启动完成后,使用浏览器访问“http://eureka7001.com/consumer/dept/list”,结果如下图。
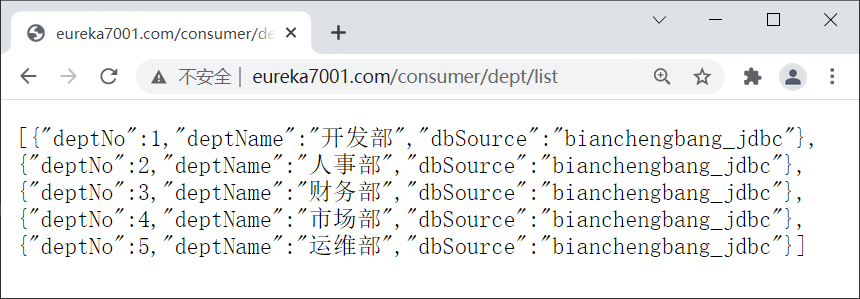
图1:OpenFeign 实现远程服务调用
7. 连续多次访问“http://eureka7001.com/consumer/dept/list”,结果如下图。
图2:OpenFeign 负载均衡
从图 2 可以看出,由于 OpenFeign 集成了 Ribbon,因此它也实现了客户端的负载均衡,其默认负载均衡策略为轮询策略。
OpenFeign 超时控制
OpenFeign 客户端的默认超时时间为 1 秒钟,如果服务端处理请求的时间超过 1 秒就会报错。为了避免这样的情况,我们需要对 OpenFeign 客户端的超时时间进行控制。
下面我们就通过一个实例,来演示 OpenFeign 是如何进行超时控制的。
1. 在所有的服务提供者(服务端)的 DeptController 中添加一个响应时间为 5 秒的服务,代码如下。
- //超时测试,该服务的响应时间为 5 秒
- @RequestMapping(value = "/dept/feign/timeout")
- public String DeptFeignTimeout() {
- //暂停 5 秒
- try {
- TimeUnit.SECONDS.sleep(5);
- } catch (InterruptedException e) {
- e.printStackTrace();
- }
- return serverPort;
- }
2. 在 micro-service-cloud-consumer-dept-feign 的 DeptFeignService 接口中添加以下代码,绑定服务端刚刚添加的超时服务。
- @RequestMapping(value = "/dept/feign/timeout")
- public String DeptFeignTimeout();
3. 在 micro-service-cloud-consumer-dept-feign 的 DeptController_Consumer 添加以下代码。
- @RequestMapping(value = "/consumer/dept/feign/timeout")
- public String DeptFeignTimeout() {
- // openFeign-ribbon 客户端一般默认等待一秒钟,超过该时间就会报错
- return deptFeignService.DeptFeignTimeout();
- }
4. 重启所有服务提供者,使用浏览器依次访问“http://eureka7001.com:8001/dept/feign/timeout”、“http://eureka7001.com:8002/dept/feign/timeout”和“http://eureka7001.com:8003/dept/feign/timeout”,确保所有服务提供者提供的超时服务都能正常使用,如下图。
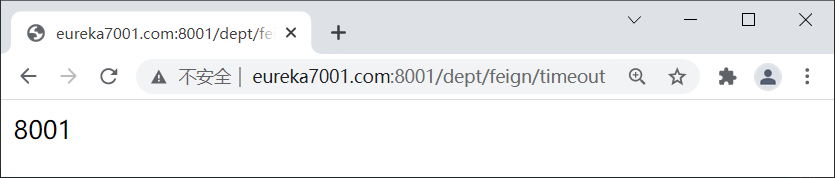
图3:服务提供者的超时服务
5. 重启 micro-service-cloud-consumer-dept-feign,使用浏览器访问“http://eureka7001.com/consumer/dept/feign/timeout”,结果如下图。
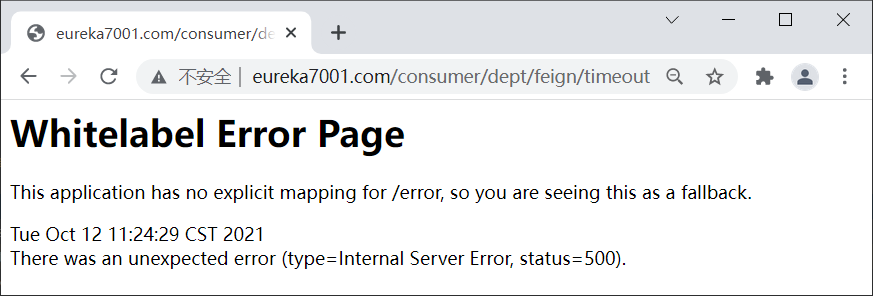
图4:OpenFeign 超时报错
6. 在 micro-service-cloud-consumer-dept-feign 的 application.yml 中添加以下配置,将超时时间设置为 6 秒。
- ribbon:
- ReadTimeout: 6000 #建立连接所用的时间,适用于网络状况正常的情况下,两端两端连接所用的时间
- ConnectionTimeout: 6000 #建立连接后,服务器读取到可用资源的时间
注:由于 OpenFeign 集成了 Ribbon ,其服务调用以及负载均衡在底层都是依靠 Ribbon 实现的,因此 OpenFeign 超时控制也是通过 Ribbon 来实现的。
7. 再次重启 micro-service-cloud-consumer-dept-feign,使用浏览器访问“http://eureka7001.com/consumer/dept/feign/timeout”,结果如下图。

图5:OpenFeign 超时控制
OpenFeign 日志增强
OpenFeign 提供了日志打印功能,我们可以通过配置调整日志级别,来了解请求的细节。
Feign 为每一个 FeignClient 都提供了一个 feign.Logger 实例,通过它可以对 OpenFeign 服务绑定接口的调用情况进行监控。
OpenFeign 日志打印功能的开启方式比较简单,下面我们就通过一个实例进行演示。
1. 在 micro-service-cloud-consumer-dept-feign 的 application.yml 中配置以下内容。
- logging:
- level:
- #feign 日志以什么样的级别监控该接口
- net.biancheng.c.service.DeptFeignService: debug
以上配置说明如下:
- net.biancheng.c.service.DeptFeignService 是开启 @FeignClient 注解的接口(即服务绑定接口)的完整类名。也可以只配置部分路径,表示监控该路径下的所有服务绑定接口
- debug:表示监听该接口的日志级别。
以上配置的含义就是,OpenFeign 以 debug 级别监控 net.biancheng.c.service.DeptFeignService 接口。
2. 在 net.biancheng.c. config 包下创建一个名为 ConfigBean 的配置类,代码如下。
- package net.biancheng.c.config;
- import feign.Logger;
- import org.springframework.context.annotation.Bean;
- import org.springframework.context.annotation.Configuration;
- @Configuration
- public class ConfigBean {
- /**
- * OpenFeign 日志增强
- * 配置 OpenFeign 记录哪些内容
- */
- @Bean
- Logger.Level feginLoggerLevel() {
- return Logger.Level.FULL;
- }
- }
该配置的作用是通过配置的 Logger.Level 对象告诉 OpenFeign 记录哪些日志内容。
Logger.Level 的具体级别如下:
- NONE:不记录任何信息。
- BASIC:仅记录请求方法、URL 以及响应状态码和执行时间。
- HEADERS:除了记录 BASIC 级别的信息外,还会记录请求和响应的头信息。
- FULL:记录所有请求与响应的明细,包括头信息、请求体、元数据等等。
3. 重启 micro-service-cloud-consumer-dept-feign,使用浏览器访问“http://eureka7001.com/consumer/dept/list”,控制台输出如下。
标签:Feign,OpenFeign,Spring,dept,cloud,注解,Cloud 来源: https://www.cnblogs.com/55zjc/p/16537136.html
本站声明: 1. iCode9 技术分享网(下文简称本站)提供的所有内容,仅供技术学习、探讨和分享; 2. 关于本站的所有留言、评论、转载及引用,纯属内容发起人的个人观点,与本站观点和立场无关; 3. 关于本站的所有言论和文字,纯属内容发起人的个人观点,与本站观点和立场无关; 4. 本站文章均是网友提供,不完全保证技术分享内容的完整性、准确性、时效性、风险性和版权归属;如您发现该文章侵犯了您的权益,可联系我们第一时间进行删除; 5. 本站为非盈利性的个人网站,所有内容不会用来进行牟利,也不会利用任何形式的广告来间接获益,纯粹是为了广大技术爱好者提供技术内容和技术思想的分享性交流网站。