标签:printer name button Next Step Printer ZPL Click
MSDyn365FO: Setup Zpl Printer to print license plate labels
Recently, I have had an opportunity review the possibilities to print license plates within D365. Unfortunately, there is no peripheral simulator available in Microsoft Dynamics 365 for Finance and operations. But there is an ability to do a tricky move by setting up the Zpl printer Chrome extension.
Use the link below to install Zpl printer Chrome extension:
https://chrome.google.com/webstore/detail/zpl-printer/phoidlklenidapnijkabnfdgmadlcmjo

Once you install that, keep it running.
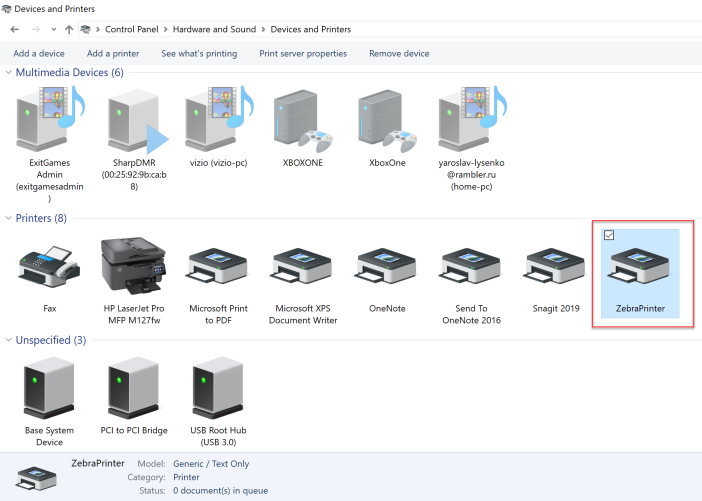
Go to Control pane > Devices and Printers on your laptop.
Click Add a printer button.
Click The printer that is I want isn’t listed link.
Click Add a local printer or network printer with manual settings.

Click Create a new port.
Choose Type of port = Standard TCP/IP port.

Click Next button.
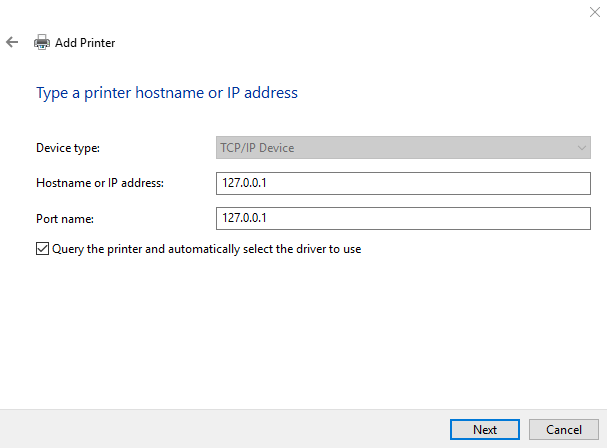
Set Host name or IP address = 127.0.0.1
Keep Query the printer and automatically select the driver to use as YES.
Click Next button.
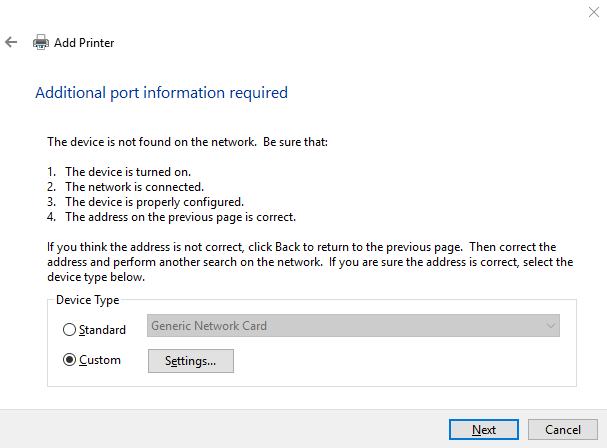
Wait until Detecting TCP/IP port operation is completed.
Select Device type = Custom.
Click on Settings button.
Make sure that:
Port name = 127.0.0.1
Printer name or IP address = 127.0.0.1
Protocol = RAW
Port number = 9100
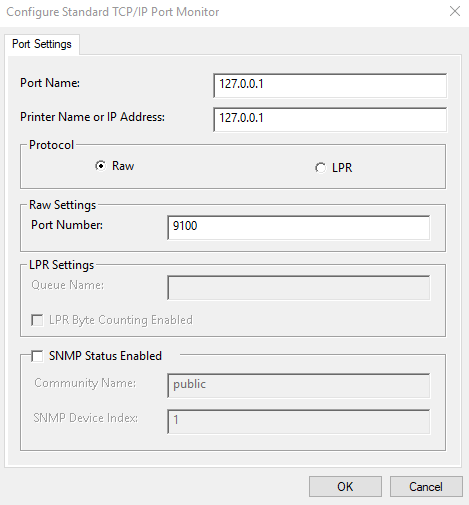
Click OK button.
Click Next button.
In the Install the printer driver, select Generic / Text only.
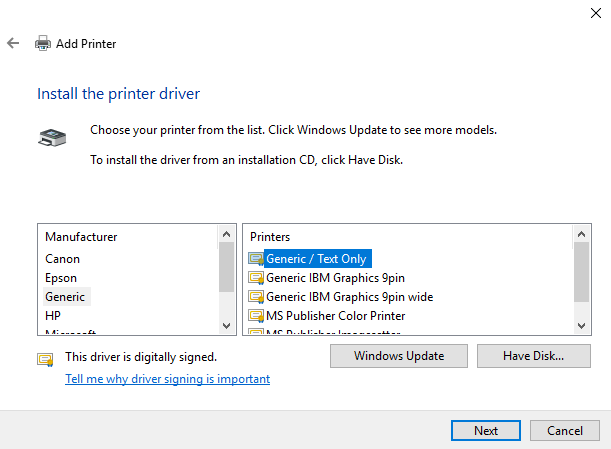
Click Next button.
In the Printer name, type in the Printer name like Zebra printer.
Click Next button.
Set Do not share this printer.
Click Next button.
Click Finish button.
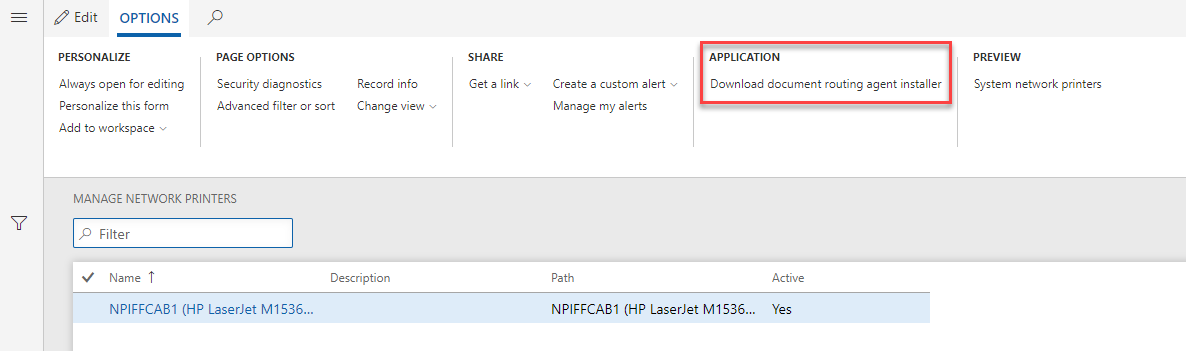
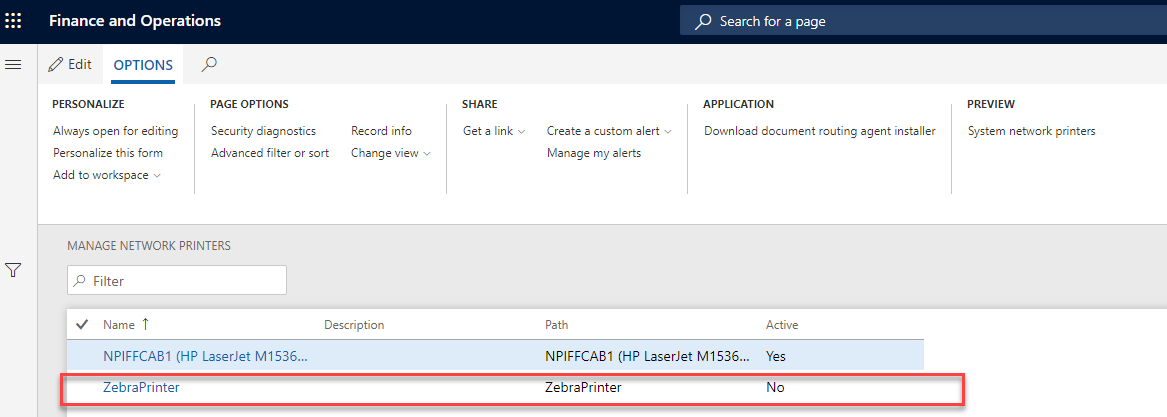
Go to Organization administration > Setup > Network printers.
Click Download document routing agent installer.
Open document routing agent installer.
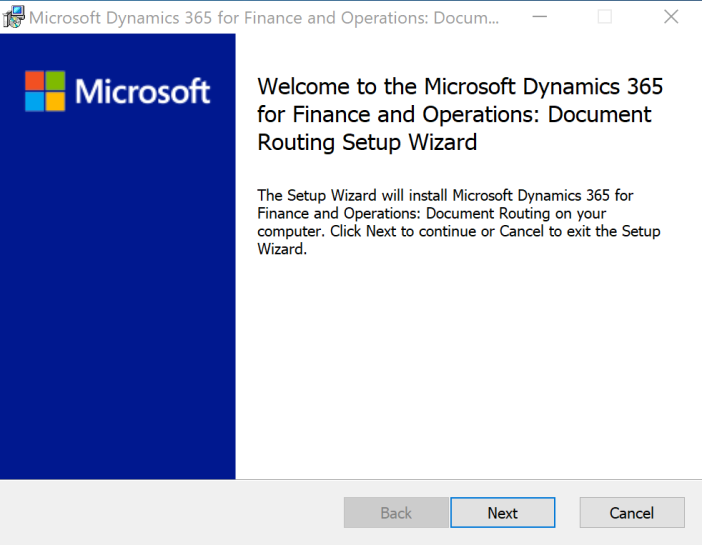
Click Next button.
Read End-user agreement and set I accept the terms in the License Agreement.
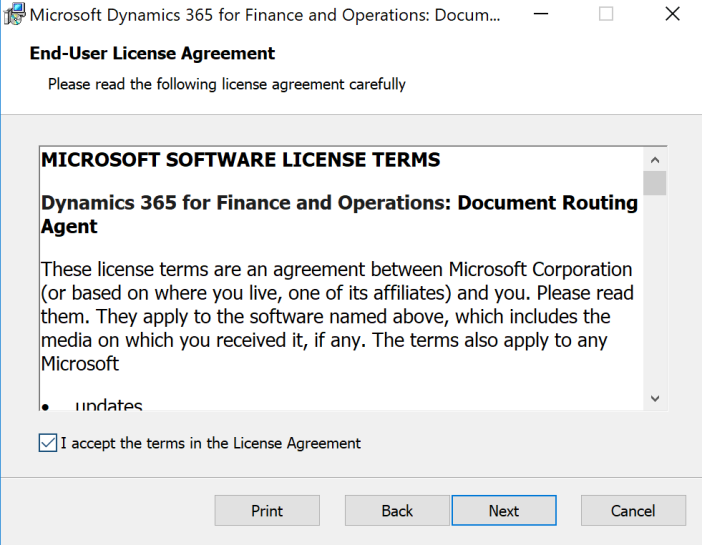
Click Next button.
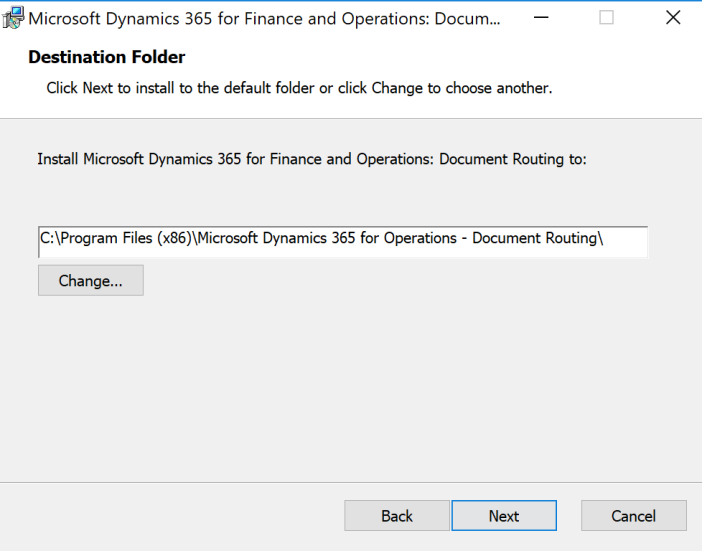
Keep Destination folder as suggested by wizard.
Click Next button.
Click Install button.
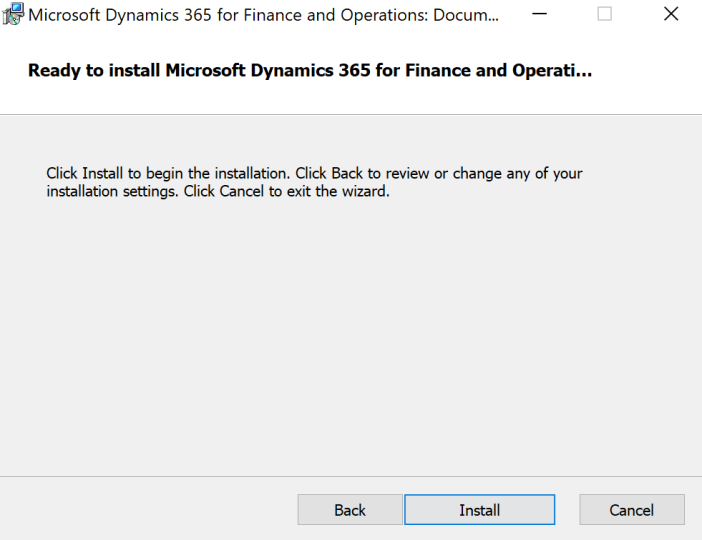
Wait until completed.
Click Finish button.

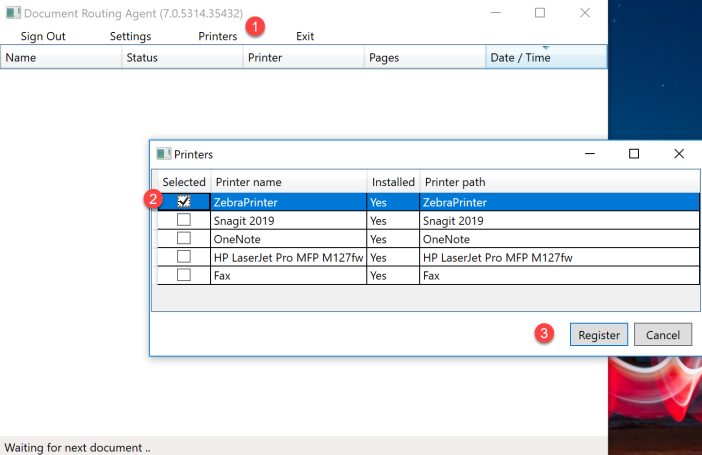
Open Document routing app installed on desktop.
No need to sign in.
Click Settings button.
In the Dynamics 365 URL set URL address of the D365FO environment.
In the Azure AD Tenant set tenant of the D365FO environment.
Click OK button.
Reopen Document routing app installed on desktop.
Sign in using your credentials.
Click Printers button.
Set flag next to Zebra printer.
Click Register button.
Go to Organization administration > Setup > Network printers.
Change Active flag to YES.
If you want to print something, do not close ZPL Printer and Document routing apps. They both should be up and running.
Good luck!
标签:printer,name,button,Next,Step,Printer,ZPL,Click 来源: https://www.cnblogs.com/lingdanglfw/p/14141545.html
本站声明: 1. iCode9 技术分享网(下文简称本站)提供的所有内容,仅供技术学习、探讨和分享; 2. 关于本站的所有留言、评论、转载及引用,纯属内容发起人的个人观点,与本站观点和立场无关; 3. 关于本站的所有言论和文字,纯属内容发起人的个人观点,与本站观点和立场无关; 4. 本站文章均是网友提供,不完全保证技术分享内容的完整性、准确性、时效性、风险性和版权归属;如您发现该文章侵犯了您的权益,可联系我们第一时间进行删除; 5. 本站为非盈利性的个人网站,所有内容不会用来进行牟利,也不会利用任何形式的广告来间接获益,纯粹是为了广大技术爱好者提供技术内容和技术思想的分享性交流网站。